
Contents (10)
- The trade that made this a rule
- One rule is universal, one part is not
- Step 1: decide what one trade may cost you
- Step 2: find where you are wrong, not where you are comfortable
- Step 3: let the arithmetic give you the size
- Step 4: cap the whole book, not just each trade
- Step 5: know the win rate your ratio needs
- The mistake almost everyone makes
- Common questions
- The short version
Risk management in trading is two decisions made before you enter, and one piece of arithmetic that follows from them. The decisions are how much money this trade is allowed to cost you, and where the price proves your idea wrong. The arithmetic turns those two numbers into your position size.
Most beginners do it backwards. They choose the size first, because a round number feels right, and then look for a stop that fits it. That one reversal has blown up more accounts than any indicator ever has.
The trade that made this a rule
I learned this the expensive way. I was waiting for a moving average crossover on a currency pair, and when it came I was so sure of the signal that I put close to half my deposit into one trade. I watched the candle turn against me in its final seconds.
That was the moment risk management stopped being a phrase I had read somewhere and became a rule. It has been rigid ever since:
Never more than a small percentage of the balance on one trade, no matter how convincing the indicator looks.
Notice what was wrong there, because it was not the analysis. The crossover may well have been a good signal. The mistake was letting confidence set the size. Confidence is the worst possible input, because it is highest exactly when you are about to be careless.
One rule is universal, one part is not
Two things are worth separating before the arithmetic starts, because they do not always go together.
The limit is universal. Whatever you trade, and whatever your platform calls the exit, there is a percentage beyond which one wrong call does damage you cannot undo. That is true of shares, futures and spot currencies, and just as true of any fixed time product where the whole stake is at risk by design. If anything, the less control you have over the exit, the more the entry size has to carry.
The sizing arithmetic is not. The steps below assume you choose your own exit price, which covers shares, futures, spot forex and CFDs. If your exit is set by the product rather than by you, skip to the sections on total exposure and on win rate. The division will not apply, but everything around it still does.
Step 1: decide what one trade may cost you
Before anything else, fix how much of your account a single losing trade is allowed to take. Write it as a percentage once, and never renegotiate it during a session.
The usual convention is 1% to 2%. There is nothing magic about those numbers. They are simply small enough that a normal run of bad luck stays survivable, and five or six losses in a row is normal. A coin lands tails five times in a row about once in every 32 tries.
| Account | 1% per trade | 2% per trade |
|---|---|---|
| $1,000 | $10 | $20 |
| $5,000 | $50 | $100 |
| $10,000 | $100 | $200 |
| $25,000 | $250 | $500 |
| $100,000 | $1,000 | $2,000 |
If those numbers look too small to be worth trading, that feeling is the thing to deal with first, not the percentage. A risk level chosen because the profits look boring is how the account ends up gone. There is more on that in why you keep losing money.
Step 2: find where you are wrong, not where you are comfortable
The stop belongs at the price that says the idea was wrong. Below the structure you are trading from, beyond the level that should have held, past the swing that defined the move. It is a statement about the chart.
It is not a statement about your account. A stop placed at “as far as I can afford” is not a stop, it is a wish. If the correct stop is too far away to fit your risk, the answer is a smaller position, never a closer stop.
Step 3: let the arithmetic give you the size
Once you have those two numbers, the position size is not a decision at all. It is a division.
- Risk in money = account × risk per trade. On $10,000 at 1%, that is $100.
- Risk per unit = entry price − stop price. Entry $50.00, stop $47.00, that is $3.00 a share.
- Position size = risk in money ÷ risk per unit. $100 ÷ $3.00 = 33 shares.
Thirty three shares at $50 is a $1,650 position on a $10,000 account. Not because $1,650 felt right, but because it is the only size at which being wrong costs exactly what you decided it could cost.
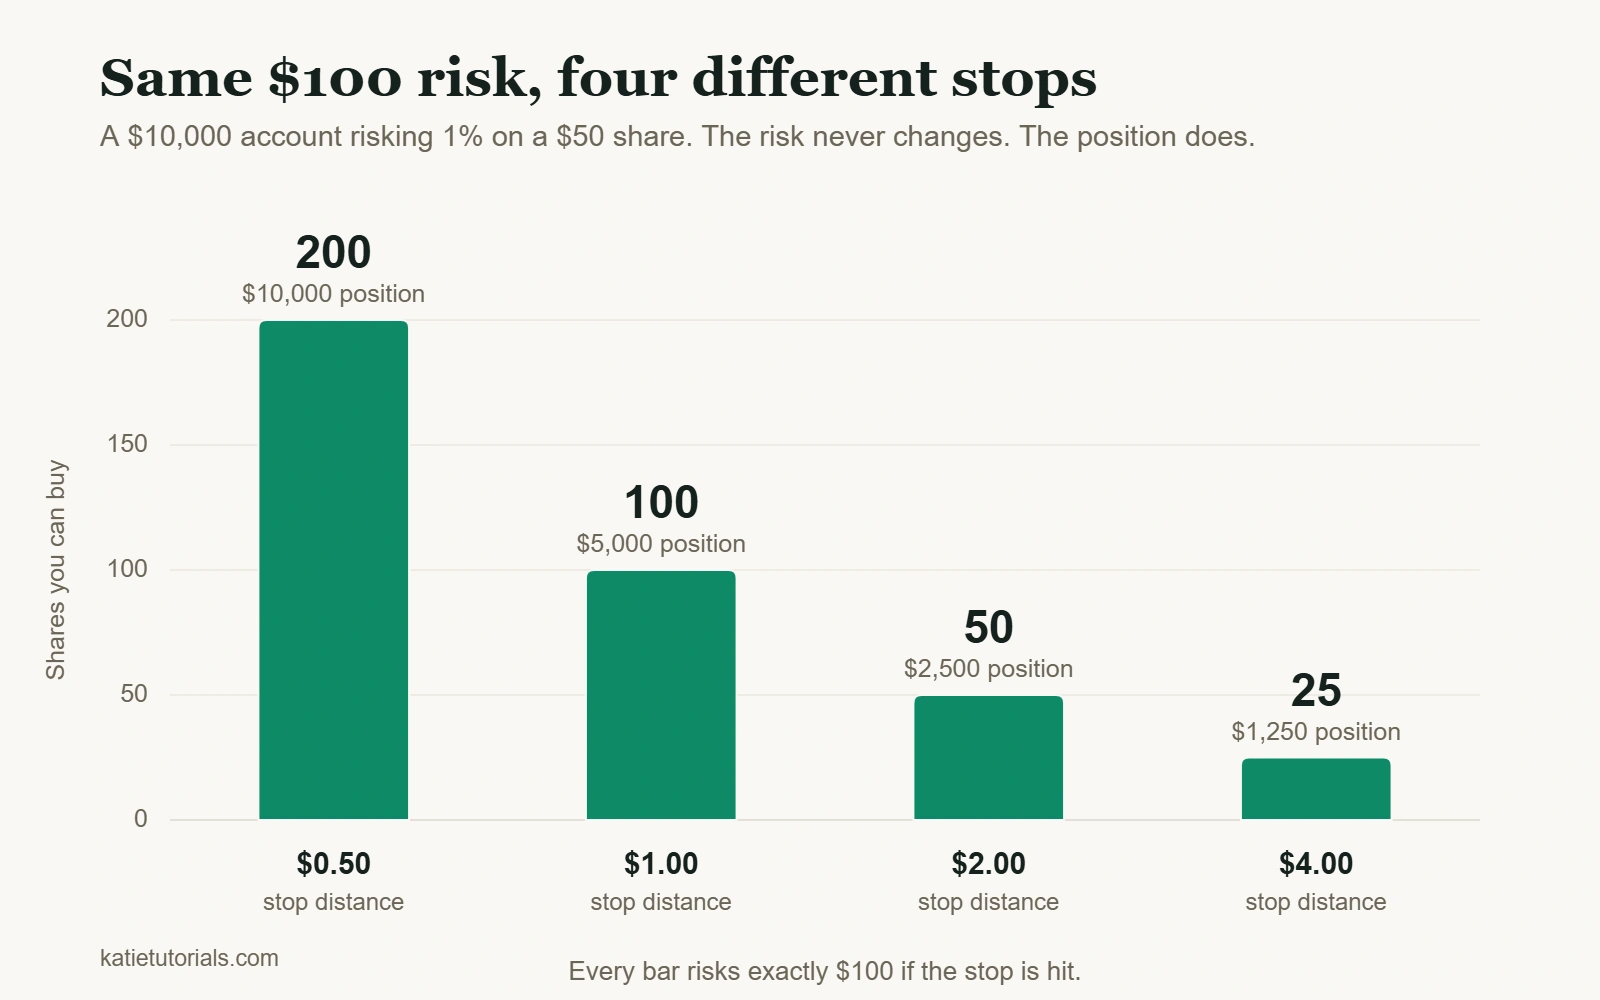
Change the stop and the size changes with it. This surprises people, so here it is with the risk held at $100 in every row:
| Stop distance | Shares you can buy | Position value at $50 |
|---|---|---|
| $0.50 | 200 | $10,000 |
| $1.00 | 100 | $5,000 |
| $2.00 | 50 | $2,500 |
| $3.00 | 33 | $1,650 |
| $4.00 | 25 | $1,250 |
A tight stop does not mean less risk. It means a larger position at the same risk, and a larger position gets stopped out more often. A wide stop does not mean more risk either. It means fewer shares. The risk stayed at $100 in every row.
Put your own numbers in:
Position size calculator
Nothing is sent anywhere. The sum runs in your browser.
Step 4: cap the whole book, not just each trade
Risking 1% five times sounds like 5%. It is only 5% if the five trades are unrelated. Four long positions in the same sector, or four currency pairs that all contain the dollar, are closer to one trade in four pieces, and they will be wrong together.
So keep a second limit on total open risk. If everything hit its stop at once, what would the day cost? That number is the one that matters, and it is usually bigger than people think.
What the 3-5-7 rule actually says
This comes up constantly, so here it is plainly. The 3-5-7 rule is a risk framework with three limits:
- 3% maximum risk on any single trade.
- 5% maximum total risk across all open positions at once.
- 7% minimum margin by which your winners should beat your losers.
It is a reasonable structure, and it makes the same point as the paragraph above: a per trade limit alone is not enough. Two honest caveats. The numbers are a convention, not a finding, so no study established 3, 5 and 7 as correct. And 3% per trade is on the aggressive side for a beginner. Many experienced traders run at a third of that.
Step 5: know the win rate your ratio needs
Risk per trade tells you what a loss costs. It says nothing about whether the strategy makes money. That depends on two things together: how much you make when you are right compared to what you lose when you are wrong, and how often you are right.
The two are locked to each other. Once you know your reward to risk ratio, the win rate you need to break even is fixed, and you can work it out in one division.
| If your winners are worth | You break even at a win rate of | Below that you lose money |
|---|---|---|
| 1× your risk | 50% | Even a coin flip is not enough after costs |
| 1.5× | 40% | Six losses in ten is survivable |
| 2× | 33% | Two out of three trades can be wrong |
| 3× | 25% | Three out of four can be wrong |
| 5× | 17% | Five out of six can be wrong |
Read the third row again, because it is the one that changes how people trade. At 2 to 1 you can be wrong on two thirds of your trades and still finish ahead. A high win rate is not the goal, and chasing one is how traders end up taking tiny profits and holding large losses.
The formula is one divided by one plus the ratio. At 2 to 1 that is 1 ÷ 3, which is 33%. Add a little on top for spread and commission, because those come out of every trade whether it wins or not.
This is also the honest test of a strategy. Track your real average win, your real average loss and your real win rate over fifty trades. If the numbers do not clear the row you are sitting on, no amount of position sizing will save it. Sizing controls how long you survive, not whether you win.
The mistake almost everyone makes
Watch the order, because this is where it goes wrong:
| What most people do | What actually works |
|---|---|
| Pick a position size that feels right | Pick the risk in money first |
| Find a stop that fits that size | Find the stop the chart justifies |
| Discover the risk after the fact | Divide to get the size |
| Move the stop when it gets close | Leave it where it was put |
The left column lets emotion set the size. The right column lets arithmetic set it. That is the point, because arithmetic does not have a bad morning.
Common questions
How much should a beginner risk per trade?
One percent is the usual starting point, and there is a good case for less while you are still learning. A small number early on is not about making money slowly. It is about keeping enough account alive to reach the fifty or a hundred trades you need before you can tell whether your approach works at all.
How do I calculate position size?
Divide the money you are willing to lose by the distance between your entry and your stop. Account $10,000, risk 1%, so $100. Entry $50, stop $47, so $3 a share. $100 divided by $3 is 33 shares. The calculator above does the same sum.
Does a stop loss guarantee my maximum loss?
No, and most articles on this subject do not say so. A standard stop is an instruction to sell at the market once a price is touched, not a promise of that price. In a gap or a fast move you can be filled well below it. Overnight gaps, weekend gaps and scheduled news are the common cases. A guaranteed stop, where a broker offers one, usually costs a wider spread or a fee. This does not make stops useless. It means the worst case is slightly worse than the arithmetic suggests, which is one more reason not to sit at the top of your risk range.
Should I move my stop if the trade goes against me?
Moving a stop further away turns a known loss into an unknown one, and it is the most common way a 1% loss becomes a 10% one. Moving a stop closer, to protect a profit once the trade has gone your way, is a different action and a defensible one. The test is simple. If you are moving it to avoid being stopped out, stop.
The short version
Decide the money first. Let the chart decide the stop. Divide one by the other and accept whatever size comes out. Keep a second limit for everything open at once.
Four sentences, and they beat every indicator you will ever install.